Suzan’s Cents – My Favorite Things about Treblemakers Summer Day Camp

Treblemakers Music Day Camp

Suzan Stroud, Founder, CEO and Head Instructor of Treblemakers Music School

When we started our first Treblemakers music Day Camp in 2009, I was excited about the projects we could do that can’t normally be done in half hour lessons.  Coming up with curriculum that enhances their growth as musicians and ignites their excitement for music is one of my favorite parts of my job.  I get to use my creativity to help them explore instruments, play music together, write and record music. It’s amazing to see the growth that students make from playing music every day over the two week session. I’m always impressed at how well they bond together, make friendships and learn to work as a team whether doing music together in the mornings or playing together at the park in the afternoons. Here are my favorite things about Park Slope summer day camp.

My 5 Favorite Things about Summer Day Camp

#1 – Watching students come out of camp ON FIRE about music. This is something that consistently happens here and I love watching it unfold. Sometimes it’s a brand new student exploring music for the first time. Other times it’s a student that has already been taking lessons. Not only do I love being able to pass on my excitement and love for music to someone else, I also know that this inspiration is crucial in propelling students forward.  Learning is so much more successful when students are working towards something THEY want to get out of it.

#2 – Seeing students rocket ahead from playing music every day at camp for two weeks. Practicing can be contagious around here. Hearing someone else play something cool makes you think, “I want to do that!” I still get that feeling.

#3 – When students come to me with requests of songs they want to learn. I know if students are playing music they love, they will be motivated to learn and practice.

#4 – When students take what I’ve taught them and create or figure something out on their own.  Mission accomplished! True understanding is the ability to learn information and then use it to do something.

#5 – When students turn around and teach someone else. Teaching someone else solidifies your own understanding as well as helping someone else.

#6 – Playing at the park with the kids and showing them that girls CAN dodgeball!
Seeing kids discover that if given the opportunity to participate and practice they get better!  This is true in music, dodgeball and the rest of life.

12 Reasons Why Students Quit Music Lessons

Drums lessons School

I have been teaching piano for over 20 years.  I pay a lot of attention to how students (mine and others) feel about lessons and why they quit.  The reason I care about this so much is really simple.  I know that most people are capable of learning to play the piano really well if they keep at it a little at a time over a long span.  You can get to somewhere enjoyable pretty quickly but there’s always more to learn.  That last part may seem discouraging but it shouldn’t be.  What that means is that you will always have something to get excited about and look forward to.  I still get a rush out of learning something new.

Here are the reasons students quit and my advice to avoid the pitfalls

1.  Not having a great teacher.

Teaching is a talent just as much as the ability to play an instrument.  Having a bad or mediocre teacher can drive the joy out of anything.  Having a great teacher can be life changing.  You need someone who not only can teach you skills but who also inspires you.

2.  Not recognizing that there will be ups and downs in enthusiasm, commitment and rate of learning.

Keep at it over the long haul and don’t quit during a down.  Change it up when you get in a rut.  Look for ways to re-spark your interest-play music in a group, perform, write, record, go hear live music or listen to music you love.

3.  Not making realistic plans on how much practice will happen and then feeling guilty.

People then quit because they want to stop feeling guilty. It is much better to make a plan you can actually live with over the long haul rather than make a plan you can’t stick to.  Forgive yourself when you get off routine.  Remember that learning music should be something that makes you feel good not be another thing to feel pressured about.  YOU have to decide how you want music to fit into your life and then be ok with that.  If you can’t practice much, accept that your progress will be slower.

4.  Not making concrete plans on when practice will happen.

Attach practice to another already existing routine so there’s not a decision to do it.  Don’t just wait to FEEL like practicing.  Something will always get in the way.

5.  Parents expecting children to be motivated and disciplined to go practice on their own.

Discipline is learned not discovered.

6.   Parents leaving the decision to take lessons or not up to kids.

Kids are not ready to make smart long term decisions yet. They are very much in the now.  No matter how much they enjoy music, there will be a time when they don’t want the work or the responsibility.  Most likely, they will regret quitting as an adult.

7. Not doing music the student loves as soon as possible.

Skills and theory can be taught through music and music can be tailored to fit the level of the student.  It shouldn’t be a far off goal.

8.  Not having clear goals on what the student wants to get out of it.

What kind of music do you want to do?  One on one lessons should be customized.  What skills to focus on might be different depending on what the student wants to be able to do.  Sometimes a student doesn’t know what they want and needs to be exposed to different things until something ignites the spark.

9.  Students being overcommitted and not showing up regularly for lessons.

I’ve seen plenty of students still make progress even if they don’t really practice but not showing up regularly for lessons on top of that make it difficult to move forward.  If there is too much time between using information, the brain will use that brain real estate for something else.

10. Right after the novelty wears off.

It’s easy to be in love with the idea of something and then the reality of the work sets in.  It’s a good idea to move as fast as you can through the ‘novelty’ period so that by the time the newness has worn off, the student is past the first bump and actually able to play fun things.

11.  Middle school and high school happen.

This is a time when many students quit.  The added social and schoolwork pressures often push piano lessons out.  This is a shame because this is the point when they’re usually capable of the most.  If students can get a solid foundation before this time hits, piano practice can be a stress reliever instead of a stress-causer.

12. Student can’t accept that struggling is part of learning.

Adults sometimes forget this is part of learning and can’t bear to have their child feel uncomfortable.  However, if they are not challenged at all, they don’t improve, get bored and quit.  Sometimes people want to believe they can learn the hard thing without doing the hard part.

Holding The Guitar

Guitar Lessons School

Guitar-Holding-Pick-1

In order to move around the guitar easily and play the music you want, it’s important to feel comfortable holding the guitar.

Sitting Position:
This is the best position to start with.

Guitar-Sitting-Position-1

1. Create a shelf to rest the curve of the guitar on. You can:
.Prop your right foot up on a low footstool. You can buy a guitar foot stand at a music store or use a child’s step stool. Just make sure it’s not too high.

.Cross your leg to create the shelf.

Guitar-Sitting-Position-2

2. Rest the curvy part of your guitar on the leg you propped up (right leg).

3. Rest your right arm on the top of the guitar.
You should be able to hold the guitar just by trapping it between your leg and your arm.

Guitar-Thumb-Centered

4. Take your left hand thumb and brace it on the back of the neck. Try to center it in the middle.

Standing Position:
You will need a guitar strap for this Position.

Guitar-Attaching-Strap 1

1. Attach the guitar strap to the guitar. One end ties around the neck.

Guitar-Attaching-Strap-2

The other end goes on the opposite end of the guitar. Push the small slit over the strap pin.


Guitar-Adjustting-Strap

2. Adjust the strap (by moving the buckle) to make it longer or shorter.
The proper length will put your guitar in a good playing position when you hang it over your neck.

Guitar-Standing-Position-1

3. Put the strap over your head so it’s across one shoulder and your guitar can hang freely on your body.

Treblemakers Students Perform at 5th Ave Street Fair 2016

Voice Singing Lessons

Thanks to all the students that came out to perform on Sunday! Although it started out a little drizzly, the street fair ended up packed, creating a nice full audience for our students as they performed. We had 22 performers performing over 30 songs on piano, voice and guitar.

Thank you to our performers: Imogen, Roscoe, Mia, Zoe, Eleanora, Audrey, Lydia, Juliana, Kate, Rachel, Alexei, Michael, Nia, Jim, Noe, Saige, Ruby, Dash, Dexter, Kaya, Niko & Madison.

Thanks to Madison for helping announce performers and having a set of ten songs ready to fill in any gaps in the schedule. She’s been practicing in preparation for more than a month even adding a few songs at the last minute.

Thanks to Alexandra for coming out to help and support our students as they performed. Her willingness to pitch in where needed whether it’s encouraging nervous performers, helping out with sound, filming or giving enthusiastic hoots from the audience is always much appreciated.

Sunday started out with the typical worries about sound set-up, rain and other logistics and ended up with the warm glow of pride. Performances are always a snapshot of students in their journey. Whether beginning, intermediate or advanced, I love the whole ride. With beginners, it’s the excitement of all the possibilities that lay ahead. With students further along, it’s being able to celebrate your progress and remember that no matter where you are in the journey, there are always new exciting possibilities ahead.

Getting up and performing can be scary for students of every level but I always encourage them to do it. I want them to have the opportunity to share their accomplishment, get inspired by what other students are doing and get the love and feedback of the audience. The street performances are especially great because the atmosphere is relaxed and festive with sincere compliments from strangers who stop to listen. I love watching the reaction of people as they are genuinely surprised by our students’ talent.

Every time we have an event, the vulnerability of new student performers still catches me off guard. In this year’s street fair I was sitting next to a student who was nervous about performing, ready to help out if necessary. As soon as she finished playing, she immediately turned her head to me to look for my approval. It always moves me and reminds me of what a huge responsibility we have as parents and teachers to give our children that approval and encouragement in those important formative moments.

Buying a Keyboard for Piano Lessons

Piano lessons

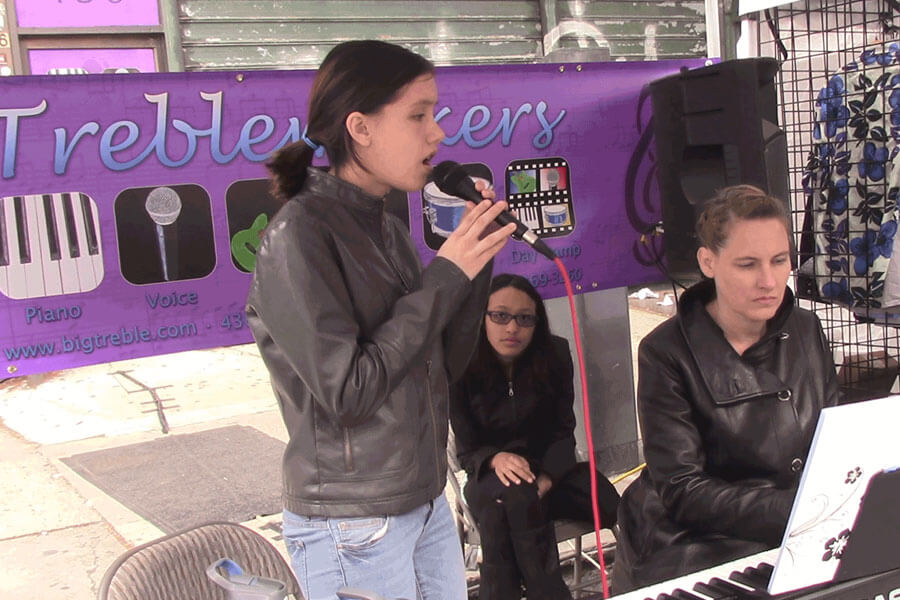
A keyboard can be an affordable and space saving alternative to owning a piano. Music equipment technology has made huge leaps in the past thirty years creating better and better options for less money. It is still an area where advancements continue to happen with new models and features coming out constantly. It can be overwhelming and confusing to wade through the information and make a good choice. We will outline some basic information and give some recommendations.

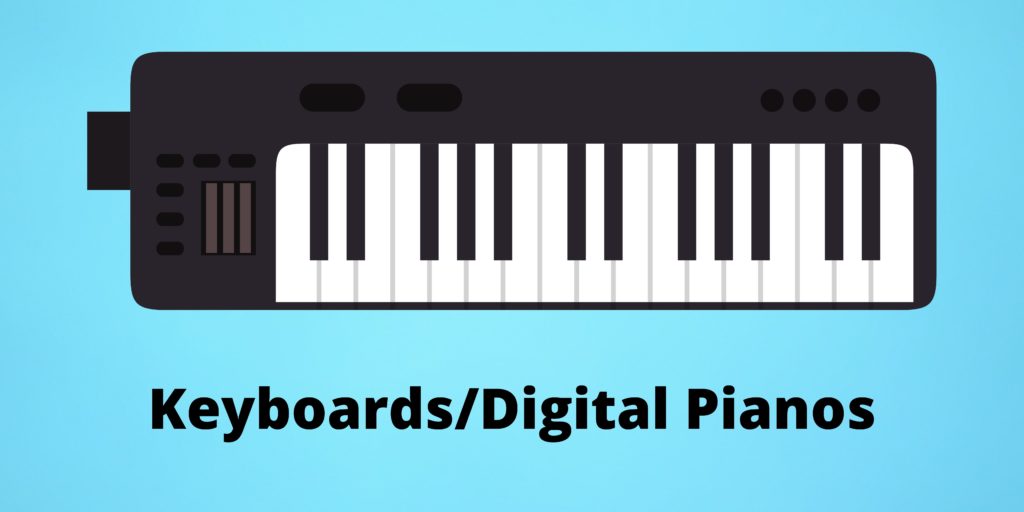
The first thing that will help you as a buyer is to understand the different kinds of keyboards. Each kind is built with a specific purpose in mind. It’s important to understand the difference between them so you don’t make the mistake of thinking you are buying a keyboard that acts like a piano and instead buying a keyboard that is designed for another purpose. This should help you not be overwhelmed with choices and avoid the confusion of marketing blurbs which often give the impression that each keyboard can suit any need. ‘Digital Pianos’ are the most suitable for learning and playing purposes. If the keyboard you are looking at doesn’t have ‘Digital Piano’ in its model name, it is in another category. Beware of close-sounding titles like ‘Grand Piano’.

Different kinds of keyboards

Digital Pianos: are meant to replicate playing a piano. The technology has been around since the 1980’s but continues to improve and move closer to the experience of a playing an acoustic piano. The focus in these instruments is in replicating the sound, action, feel and sensitivity of a piano. Digital Pianos also have built in speakers as they are designed to be able to stand alone. Because most models have midi capability, they can also be used with a computer for recording or triggering virtual instruments. They usually also have outputs for plugging into mixing boards or other sound equipment.

Keyboard controller: Controllers are meant for music sequencing and recording. They are used to play various parts (using virtual instruments) in recordings. Features are centered around these goals, not around sound, response and feel which are crucial in replicating the experience of playing a piano. Most controllers do not have any on-board sounds as they are meant to ‘control’ virtual instrument sounds from a computer. They also don’t usually have on-board speakers as it is expected they will be plugged into a recording set up that already has speakers.

Keyboard workstation: An all in one unit for recording and playing parts. Not meant to replicate the experience of playing a piano.

Synthesizer: Meant to play and perform synthesized sounds (sounds created using computer algorithms). Keys are usually flimsy with no weighted action and limited sensitivity. May not have built in speakers. Not meant to replicate the experience of playing a piano.

Sampler: A keyboard that can sample sound. This is a process of taking a small recording snippet of sound and being able to play it back using the keys of the keyboard. There is usually the ability to edit the sounds created. There are many factory created samples that are usually also included on the keyboard, including piano samples. Digital pianos use this same sampling method to create their piano sounds creating a realistic sound. Although the piano sample on a sampler keyboard may sound good the keyboard doesn’t usually feel like a piano. Not meant to replicate the experience of playing a piano.

Keyboard: You may not be able to tell what category a keyboard falls into if they list it generically as a ‘keyboard’. This is because some keyboards try to fill the functions of several keyboards as an ‘all in one’. It may not have built in speakers.

Simple rule: If it doesn’t say ‘digital piano’ in the model name, it will definitely have compromised on some of the most important features that make a digital piano in order to fulfill its other roles. Although it often implies it will, it will NOT be a choice that gets as close as possible to replicating the experience of playing a piano. Keyboards can be ok in the very beginning to get started and see if you will stick with lessons before investing in something more expensive but they are not usually a long term option.

Crucial High Quality Features Desirable in a Great Digital Piano:

Piano Sample and Voice Engine: This is the part the most drastically affects the sound of the piano. An authentic piano sound requires complexity in the sampling and the computer processing to handle to it. Sampling involves layering small snippets of recordings of each note to replicate all the tonal differences and subtleties of an acoustic piano. The best Samples respond to the way a player hits the note triggering a different sample to reflect the way an actual piano would respond and sound. This technology continues to improve. There is a noticeable difference between very old models and newer ones.

Good Built in Speakers: Speakers can make all the difference in the quality and volume of the sound. Below 8W speakers on a digital piano negatively affects the quality of sound and is often not loud enough to fill a room at full volume. A great sounding piano sample will not sound good played through lousy speakers. Speakers that face the ceiling instead of the floor are also an important factor. Floor facing speakers tend to sound more muffled and muddy.

88 Weighted keys: 88 keys are really necessary to not be limited in the music that can be played. Even if you’re missing one note that you need in a song, it’s a problem. It will be confusing and not sound the same if the note is replaced the same note in another octave.

Weighted refers to the resistance required to press down keys. This is important in learning proper technique and dexterity required to play an acoustic piano. Students that practice solely on unweighted keys for too long have trouble adjusting to the feel of a real piano.

Graded refers to the upper range having less resistance than the lower range the way it occurs on an acoustic piano.

Action: The feel of the keys being pressed down and how they spring back up again. ‘Thumpy’ or ‘Flimsy’ actions can make it hard to play fast or difficult passages well and need to be able to spring back quickly. It’s also important in allowing players to be expressive in their playing.

Sensitivity– Refers to how how the keys respond to a player’s touch and pressure. A good instrument should have sensitive dynamic (louds and softs) and tonal response. (Tone refers to the characteristics that describe a sound. Examples: shrill, smooth, bright, warm etc.)

Polyphony: How many keys can be pressed down at one time and all still continue to sound. Pianos have strings that are struck by hammers and continue to ring until the string stops vibrating. Notes on a keyboard trigger samples of each note. More notes being held or played at the same time require more processing power. Once the amount of voices (notes) in the polyphony are reached, the keyboard will cut off held notes. This quickly can become a problem when the sustain pedal is used. A minimum of 128 voice polyphony is preferred for 88 keys.

MIDI Capablity: Stands for ‘Musical Instrument Digital Interface’. Allows information to be sent and received between instruments and computers. Used for recording and other music technology programs. There are so many great and affordable programs for creating music recordings, sheet music and even note and rhythm reading practice. They are available on phones, computers and tablets. Hook-ups to these devices are easy through MIDI USB cables or standard MIDI ports.

Slim profile: Important feature for those with limited space. The dimensions of the slimmest 88 key digital pianos are 52 ” width and 12” depth.

General Keyboard Recommendations

61 Key Keyboards

Casio and Yamaha are the best temporary options if there is a desire to try lessons out before committing to a bigger instrument purchase. Continuing to practice solely on a beginner keyboard beyond the beginning stage can be very limiting and doesn’t allow work on musicality or technique. These keyboards lack: weighted keys, proper action, sensitivity and enough keys to play the majority of music.

Budget can also be a reason to buy a beginner keyboard first. However, If you are already committed to taking lessons and have the money for the digital piano purchase, skip the beginner keyboard. If having the lump sum of four or five hundred dollars feels like a strain, limited-time 0% financing is usually available at one of the many places you can find music equipment.

88 Key Digital Pianos

Casio Privia Series and Yamaha P-series both manufacture great choices under $1000 that we recommended for their balance in functionality and affordability. While there are are many other choices above $1000, the extra cost is not necessary in order to get a solid instrument.

Click Here Specific Keyboard Recommendations 

Other items you will need with your keyboard:

Getting the keyboard bundled with wooden stand, pedalboard and bench is worth it. It tends to be a better deal than if you buy the items separately. You can certainly get cheaper components but loose pedals tend to slide around and foldable stands can wobble. Sometimes third party stands and benches don’t set to the right playing height as well.

Keyboard Stand: If the keyboard won’t be traveling a lot, the wooden stand is the best option. Although more expensive, it creates a sturdy playing surface at the correct height and is more compact and attractive. It’s important to have one that will go low enough for a good sitting position.

Sustain Pedal: You can get a universal sustain pedal for $25-30 (linked one is $19 at the time of this post, pricing subject to change). Polarity is switchable to work with any brand of keyboard. You may not need this for a while as you’ll learn to connect your notes with your fingers first.

Keyboard Bench: It doesn’t need to be fancy but it should be comfortable and be able to adjust the height so that arms are in a comfortable playing position at the keyboard. We recommend purchasing one that has enough room for you to sit with a young child while practicing together.

Final thoughts:

The less well known brands or cheaper model lines come in at a lower price (around $300) but we advise against these due to the corners they cut in areas that are important for a digital piano. Action, response, sensitivity, polyphony and poor speaker quality (or too low wattage) may not be noticeable by looking at the keyboard but will become apparent not too far down the road at home. If budget is an obstacle, we recommend purchasing the entry-level Casio Privia and opting for cheaper bench, stand and pedal.

It’s also possible to get a better quality used one for the same price. Unlike used pianos which can be hard to assess if anything is wrong, keyboards are easy. Try all of the buttons and make sure everything works and that the sound isn’t crackly or buzzy. Out-of-the-ordinary sounds coming from any of the keys may indicate a problem. Buzzing might also indicate something is loose. It may only happen when certain keys sound. It is often as simple as the screws on the outside case have slowly been vibrated loose by sound over time.

Purchasing a used keyboard is always a matter of personal judgement, so we recommend caution in favor of saving money, but if the value is there and you feel comfortable with the seller, it can be a great way to save a couple hundred dollars off the price of a digital piano.

Halloween Songs For Students to Perform – Part 1

halloween-songs

Halloween in Park Slope, Brooklyn is a major holiday. Last year, Treblemakers Music Students dressed up in their costumes to perform Halloween songs front of the Old Stone House as part of their Halloween activities. This year monsters and princesses will be performing in the front corner of Dizzy’s restaurant at 230 5th avenue in Brooklyn. I’ve been compiling Halloween songs and arrangements that sound great for students to play and sing.

On my list you will find songs about monsters, murder, witches, ghosts and zombies. I included songs from all kinds of genres, including pop, classical, broadway, and movie, tv and video game themes.

piano-keys-publicdomainpictures


Play and Sing Halloween Songs

Bad Moon Rising Creedance Clearwater Revival
Black Magic Woman Santana
Bewitched, Bothered and Bewildered by Pal Joey
Bring Me to Life by Evananence
Casper The Friendly Ghost by David/Livingston
Creep by Radiohead
Cruella Deville by Roger Radclife
Demons by Imagine Dragons
Ding Dong The Witch is Dead by Arburg/Arlen
Ghostbusters by Ray Parker Junior
I Always Feel Like Somebody’s Watching Me by Rockwell
Jack’s Lament by Danny Elfman
Kill My Boyfriend by Natalia Kills
Monster by Imagine Dragons
Monster Mash by Bobby Pickett
Oogie Boogie’s Song by Danny Elfman
Murder by Numbers by The Police
Sally’s Song by Danny Elfman
She Wolf by Shakira
Still Alive from Portal by Jonathon Coulton
Superstition by Stevie Wonder
That Old Black Magic Arlen/Mercer
The Adams Family Theme by Vic Mizzy
The Monster by Rihanna & Eminem
There’s A Zombie On Your Lawn from Plants vs. Zombies by Laura Shigihara
This is Halloween Danny Elfman
Thriller by Michael Jackson
Want You Gone from Portal 2 by Jonathon Coultan
Werewolves of London by Warren Zevon
Witchcraft by Coleman/Leigh
Who’s Afraid of The Big Bad Wolf by Churchhill/Ronell
Zombie by The Cranberries

Look for part two for a list of piano solos and free sheet music give-aways!

beethoven symphony no 5 level 1a

Halloween Songs For Students to Perform – Part 2

Summer Music Camp

Here’s my handpicked list of songs that work well as solo piano arrangements for Halloween.  I included creepy or suspenseful songs from all kinds of genres, including classical, broadway, and movie and tv themes. Don’t forget to check out part 1 of Halloween Songs For Students to Perform.

Piano Solo Halloween Songs

  1. 5th Symphony by Beethoven

  2. Bewitched Theme by Greenfield/Keller

  3. Bewitched, Bothered and Bewildered by Pal Joey

  4. Casper The Friendly Ghost by David/Livingston

  5. Corpse Bride by Danny Elfman

  6. Cruella Deville by Roger Radclife

  7. Ding Dong The Witch is Dead by Arburg/Arlen

  8. Duel of The Fates by John Williams

  9. Great Pumpkin Waltz by Vince Guaraldi

  10. Halloween Theme Music   John Carpenter

  11. Imperial March by John Williams

  12. Jack’s Lament by Danny Elfman

  13. Jaws Theme by John Williams

  14. Knight Rupert by Schumann

  15. Phantom Rider by William Gillock

  16. Sally’s Song by Danny Elfman

  17. Snake Dance by Unknown

  18. The Adams Family Theme by Vic Mizzy

  19. This is Halloween  Danny Elfman

  20. Who’s Afraid of The Big Bad Wolf by Churchhill/Ronell

  21. The Wild Horseman by Schumann

  22. Tubular Bells (theme from the Exoricist) by Mike Oldfield

Look for part two for a list of piano solos and free sheet music give-aways!

How To Tune Your Guitar

Guitar Lessons School

How to Tune Your Guitar

When taking guitar lessons, one of the first things you need to learn is how to tune your guitar. A lot of beginners struggle with tuning their guitar quickly and accurately. Although there are different ways to tune the guitar, stick to the easiest method in the beginning and don’t get discouraged. If your guitar is extremely out of tune or you have just replaced the strings, you may want to have someone else tune most of the way first. It’s best if you’re only making small adjustments when you first start to tune since it’s easy to get lost and tune the notes an octave or more too high which can result in breaking a string.
There are alternate tunings that may be used for certain songs or styles as a more advanced student explores certain songs or styles but ‘Standard’ tuning is what most players will use the majority of the time and is all that is necessary to learn in the beginning.

Different ways to tune

• Use a guitar tuner or tuning application. (Easiest way to tune-see below.)

• Tune to the notes on a piano. This requires being able to hear and match the notes on the guitar with notes sounded on the piano which can be difficult to do accurately in the beginning. It also requires that the piano is in tune. See ‘guitar string notes’ below to find the notes on the piano.

• Tune to the harmonics. (A piano or tuner will still be needed to tune the first string.) This is a more complicated method to tune. It requires being able to create the harmonic on the strings then listening to the beats of the sound wave until they line up as the tuning peg is turned. The advantage of this method is that the relationships between the notes from string to string should be perfectly in tune with each other. Save this method for later.

How To Tune Your Guitar - 1

The Guitar’s Headstock And Tuning Pegs

The headstock is on the end of the guitar neck, opposite the body. On the headstock, there will be six plastic or tuning pegs. Turning these pegs will either tighten the guitar strings making their pitch higher or loosen them making the pitch lower.

Guitar Headstock

Guitar Headstock and Tuning Pegs

Using a tuner

1. Clip tuner on head of guitar. (if non-clip on model, set near guitar)
2. Turn on tuner.
3. Locate low E string. (String closest to ceiling.)
4. Locate low E peg. (Follow string to attached peg.)
5. Pluck string and let ring. (Don’t pull at string.)
6. As string is ringing, turn pin until correct letter lights up.
7. After correct letter lights up, tune string up or down until needle is centered over letter.
(Make sure there isn’t a sharp or flat next to the letter.)
8. Continue tuning the strings in the order below:
E 6th String (closest to ceiling, lowest in pitch)
A 5th String
D 4th String
G 3rd String
B 2nd String
E 1st String (closest to floor, highest in pitch)

Guitar Tuner Display

• Tuners may look slightly different but most have a letter or screen that lights up to show when the pitch is correct. Some have a needle that moves to show whether sharp, flat and correct pitch.

Tuning Tips

Only turn peg while string is ringing, otherwise your ear and the tuner can not tell how much the pitch is changing.
Move tuning pegs by VERY small increments. Making big turns will result in overshooting the pitch and make it hard to hit in right on. You may find yourself stuck jumping back and forth between’ too high’ and ‘too low’.
Pluck string loud and clear so it will ring for a long time giving you more time to adjust the tuning peg. You can also hit the string over and over as you turn the peg to keep it ringing while you adjust the pitch.

Suzan’s favorite Guitar Tuning App: Guitar Tuna

Guitar Tuna (Android, iOS or PC) is my favorite for teaching students how to tune. I find that students learn how to tune quicker and with less confusion. It has a grid that shows the pitch moving in real time that gives a clear visual picture of what’s happening as you turn the tuning peg. It shows ‘too high’, ‘too low’ and then lights up when it’s in tune. Some tuners only show the letter of the pitch sounding and use a needle to show if you’re sharp or flat of the letter you’re on. This can be very confusing as as the needle will reset each time the letter of the pitch changes. Between the letters flashing and the needle bouncing around from high to low, I find that students easily get confused. This app also has some other great learning features that I’ll review in another article.

Low E String Tuned Too Low Low E String Tuned Too High Low E String Tuned Correctly
How To Tune Your Guitar - 4 How To Tune Your Guitar - 5 How To Tune Your Guitar - 6

Rhythm Cake: Understanding Rhythm Is A Piece Of Cake

piece-of-cake

rhythm-cake-1

We’ll use a cake and a measure of music to explain rhythm, but first a quick OVERVIEW.

Each line and note on the staff stands for a note.

rhythm-cake-2

  • What kind of note is used tells how long to hold it.

rhythm-cake-notes

  • Symbols are placed on the staff to show what to play and show time going by.

rhythm-cake-8


Notes go up rhythm-cake-9 and down rhythm-cake-10 on the staff.

Time goes from rhythm-cake-11 left to right rhythm-cake-12

  • Time is separated into beats (counts) and measures.

rhythm-cake-13  

  • Time signature rhythm-cake-14 shows how many beats per measure (top number) and what note gets the beat (bottom number)

.

(2 = half note, 4 = quarter note, 8 = eighth note, 16 = sixteenth note)

rhythm-cake-15

     Imagine that a measure is a cake.    

     measure-and-rhythm-cake


  • It is already cut into 4 even pieces or beats (counts). rhythm-cake-18
  • Each piece is numbered 1, 2, 3, 4.
  • Imagine that people are eating cake and the notes are the pieces of cake.
  • If one person wants cake they get the whole cake = 4 pieces

     Whole note = 4 counts

rhythm-cake-sliced

  • If two people want cake, we split the cake in half and each person gets two pieces.          

     Half note = 2 counts

rhythm-cake-sliced-half

  • If four people want cake, each person gets one piece.                                   

     Quarter note = 1 counts

rhythm-cake-sliced-quarter

  • If eight people want cake, each person gets a half a piece of cake. (each piece is cut in half)

     Eighth note = ½ a count

rhythm-cake-sliced-eighth

  • If sixteen people want cake, each person gets one-fourth a piece of cake.

     (each piece gets cut into 4 smaller pieces)

     Sixteenth note = ¼ of a count

rhythm-cake-sliced-sixteenth

Counting Rhythms

  • In order to be able to count rhythms, each part of the beat is named.
  • Each whole beat gets a number  1 2 3 4

rhythm-cake-34

     Counting Whole notes

rhythm-cake-35

     Counting Half Notes

rhythm-cake-36

     Counting Quarter Notes

rhythm-cake-37

     Counting Eighth Notes

  • The beats need to be cut in half for eighth notes, the first half of the beat is called the        number, and the second half of each beat is called ‘&’ (and).  1 & 2 & 3 & 4 &.

rhythm-cake-39

     Counting Sixteenth Notes

  • The beats need to be cut in fourths for sixteenth notes, the first fourth of the beat is called the number, the second fourth of the beat is called ‘e’ (long ee), the third fourth is called ‘&’ and the last fourth is called ‘a’ (uh).

rhythm-cake-40

rhythm-cake-41